

Kết quả 1 đến 1 của 1
-
08-10-2023, 04:45 PM #1
 Silver member
- Ngày tham gia
- Jul 2023
- Bài viết
- 119
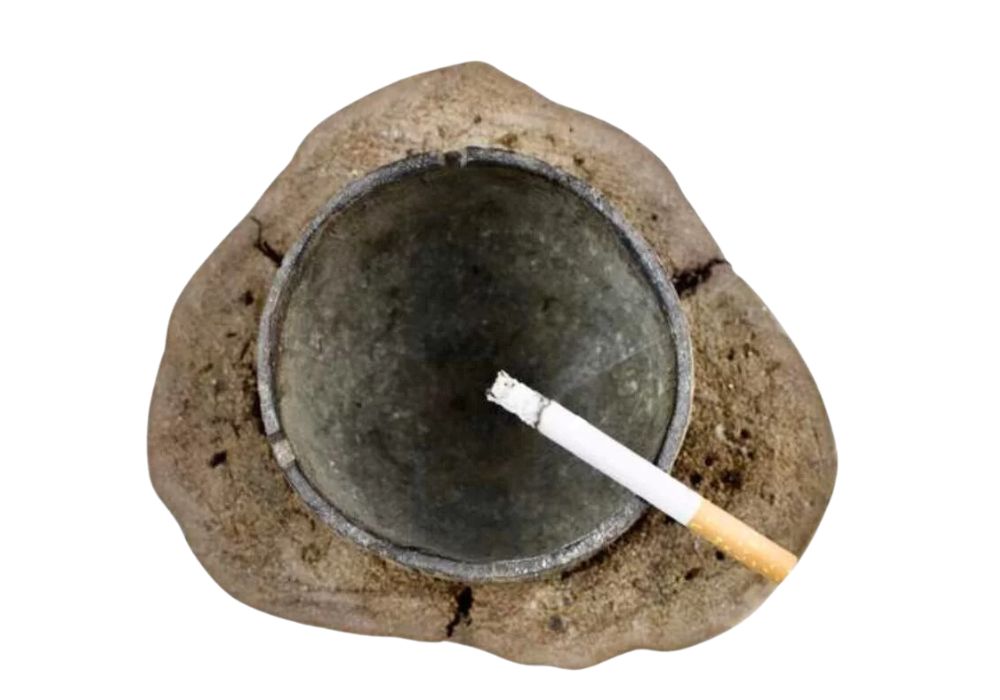
Coconut shell ashtray & Coconut shell carbon water filter
Coconut shell ashtray
A coconut shell ashtray is a functional and often decorative item made from the shell of a coconut that has been cleaned, hollowed out, and repurposed to hold cigarette ash.
Here's how you might create one:
Materials Needed:- Coconut shell (cleaned and dry)
- Sandpaper (medium and fine grit)
- Varnish or sealant (optional)
- Cork or felt pads (to prevent scratching surfaces)
Steps:
Prepare the Coconut Shell: Begin by cleaning the coconut shell. Remove any residual coconut meat and rinse it thoroughly. Let it dry completely.
Hollow Out the Shell: Using a hand drill, carefully create a hole in the top of the coconut shell. Make the hole large enough to accommodate a cigarette or cigar. You can use various drill bit sizes to achieve the desired opening.
Smooth the Edges: Use medium-grit sandpaper to smooth the edges of the hole you drilled. This will help prevent any sharp or rough edges that could be uncomfortable to handle.
Sand and Shape: Use the medium-grit sandpaper to sand the exterior of the coconut shell. This will help smoothen the surface and remove any rough spots. If you want a polished look, you can switch to fine-grit sandpaper for a smoother finish.
Optional: Apply Varnish or Sealant: If you want to give your ashtray a polished and protective finish, you can apply a clear varnish or sealant to the exterior of the coconut shell. This step is optional but can help enhance the appearance and durability of the ashtray.
Attach Protective Pads: To prevent the coconut shell ashtray from scratching surfaces, you can attach small cork or felt pads to the bottom. This will also add stability to the ashtray.
Final Touches: Once the varnish (if used) has dried and the protective pads are attached, your coconut shell ashtray is ready for use. Place it on a stable surface and use it as intended.
Remember, smoking can be harmful to health, and it's important to consider the health risks associated with smoking before engaging in this activity. If you or someone you know is trying to quit smoking, there are various resources and support systems available that can help.
Coconut shell carbon water filter
Creating coconut shell carbon water filter involves using activated carbon made from coconut shells to remove impurities and contaminants from water.
Activated carbon is known for its ability to adsorb (bind to its surface) a wide range of organic and inorganic substances, making it an effective material for water filtration. Here's a general guide on how you might create a simple coconut shell carbon water filter:
Materials Needed:- Coconut shells (dried and crushed)
- PVC pipe or plastic container (for housing the filter)
- Fine mesh or cloth (to prevent carbon from escaping)
- Gravel or small stones (for support)
- Sand (for additional filtration)
- Water source with impurities (for testing)
Steps:
Prepare the Coconut Shell Carbon:- Collect and thoroughly clean the coconut shells to remove any remaining coconut meat or husk.
- Dry the shells completely, either by letting them air dry or by using an oven at a low temperature.
- Crush the dried coconut shells into small pieces. You can use a hammer or a heavy object to break them down.
Construct the Filter Housing:- Use a PVC pipe or a plastic container to create the housing for your filter. Make sure it's clean and free from any contaminants.
- Cut the bottom of the PVC pipe or container to allow water to flow through.
Layer the Filter Mediums:- Place a layer of fine mesh or cloth at the bottom of the housing. This will prevent the coconut shell carbon from escaping into the filtered water.
- Add a layer of small stones or gravel to provide support for the filter media layers above.
Add Coconut Shell Carbon:- Add a layer of crushed coconut shell carbon on top of the gravel layer. The thickness of this layer can vary depending on the size of your filter.
Add Sand Layer (Optional):- If you want to enhance filtration further, you can add a layer of sand on top of the coconut shell carbon. The sand will help capture smaller particles and impurities.
Final Layer and Testing:- Add another layer of fine mesh or cloth on top of the sand (if used) to prevent it from mixing with the filtered water.
- Secure the filter housing to ensure that the layers remain in place.
- Pour water through the filter and collect the filtered water on the other side.
- Test the filtered water for impurity reduction and taste improvement.
Remember that this is a basic overview of creating a coconut shell carbon water filter. Commercial water filtration systems often include multiple stages and sophisticated designs to ensure thorough purification. If you're looking for a reliable and effective water filtration solution, consider purchasing a professionally designed water filter system that meets your specific needs.

 Trả lời kèm Trích dẫn


Ngoại trừ một số ít trường hợp rãnh mũi - má và “râu rồng silicon” xuất hiện sớm, có khi từ tuổi thanh niên do cơ địa, còn lại, đại đa số do căn nguyên lão hoá đã gây nên ba diễn biến: Giảm mô xương...
Phương án thẩm mỹ rãnh mũi ở tuổi trung niên hiệu quả